Upon launching Merlin Project, you will either be greeted by the last project you worked on or see a window that offers options to create a new project (based on an empty document or a pre-set template) or open a recent one. Additionally, you can access our help and instructions section for links to our support team and our YouTube channel or create and open your templates. If you ever encounter uncertainty, the Merlin Project manual is readily available to provide answers.
For now, let's begin with a blank canvas. Open a new project based on an empty document.
Navigation in Merlin Project

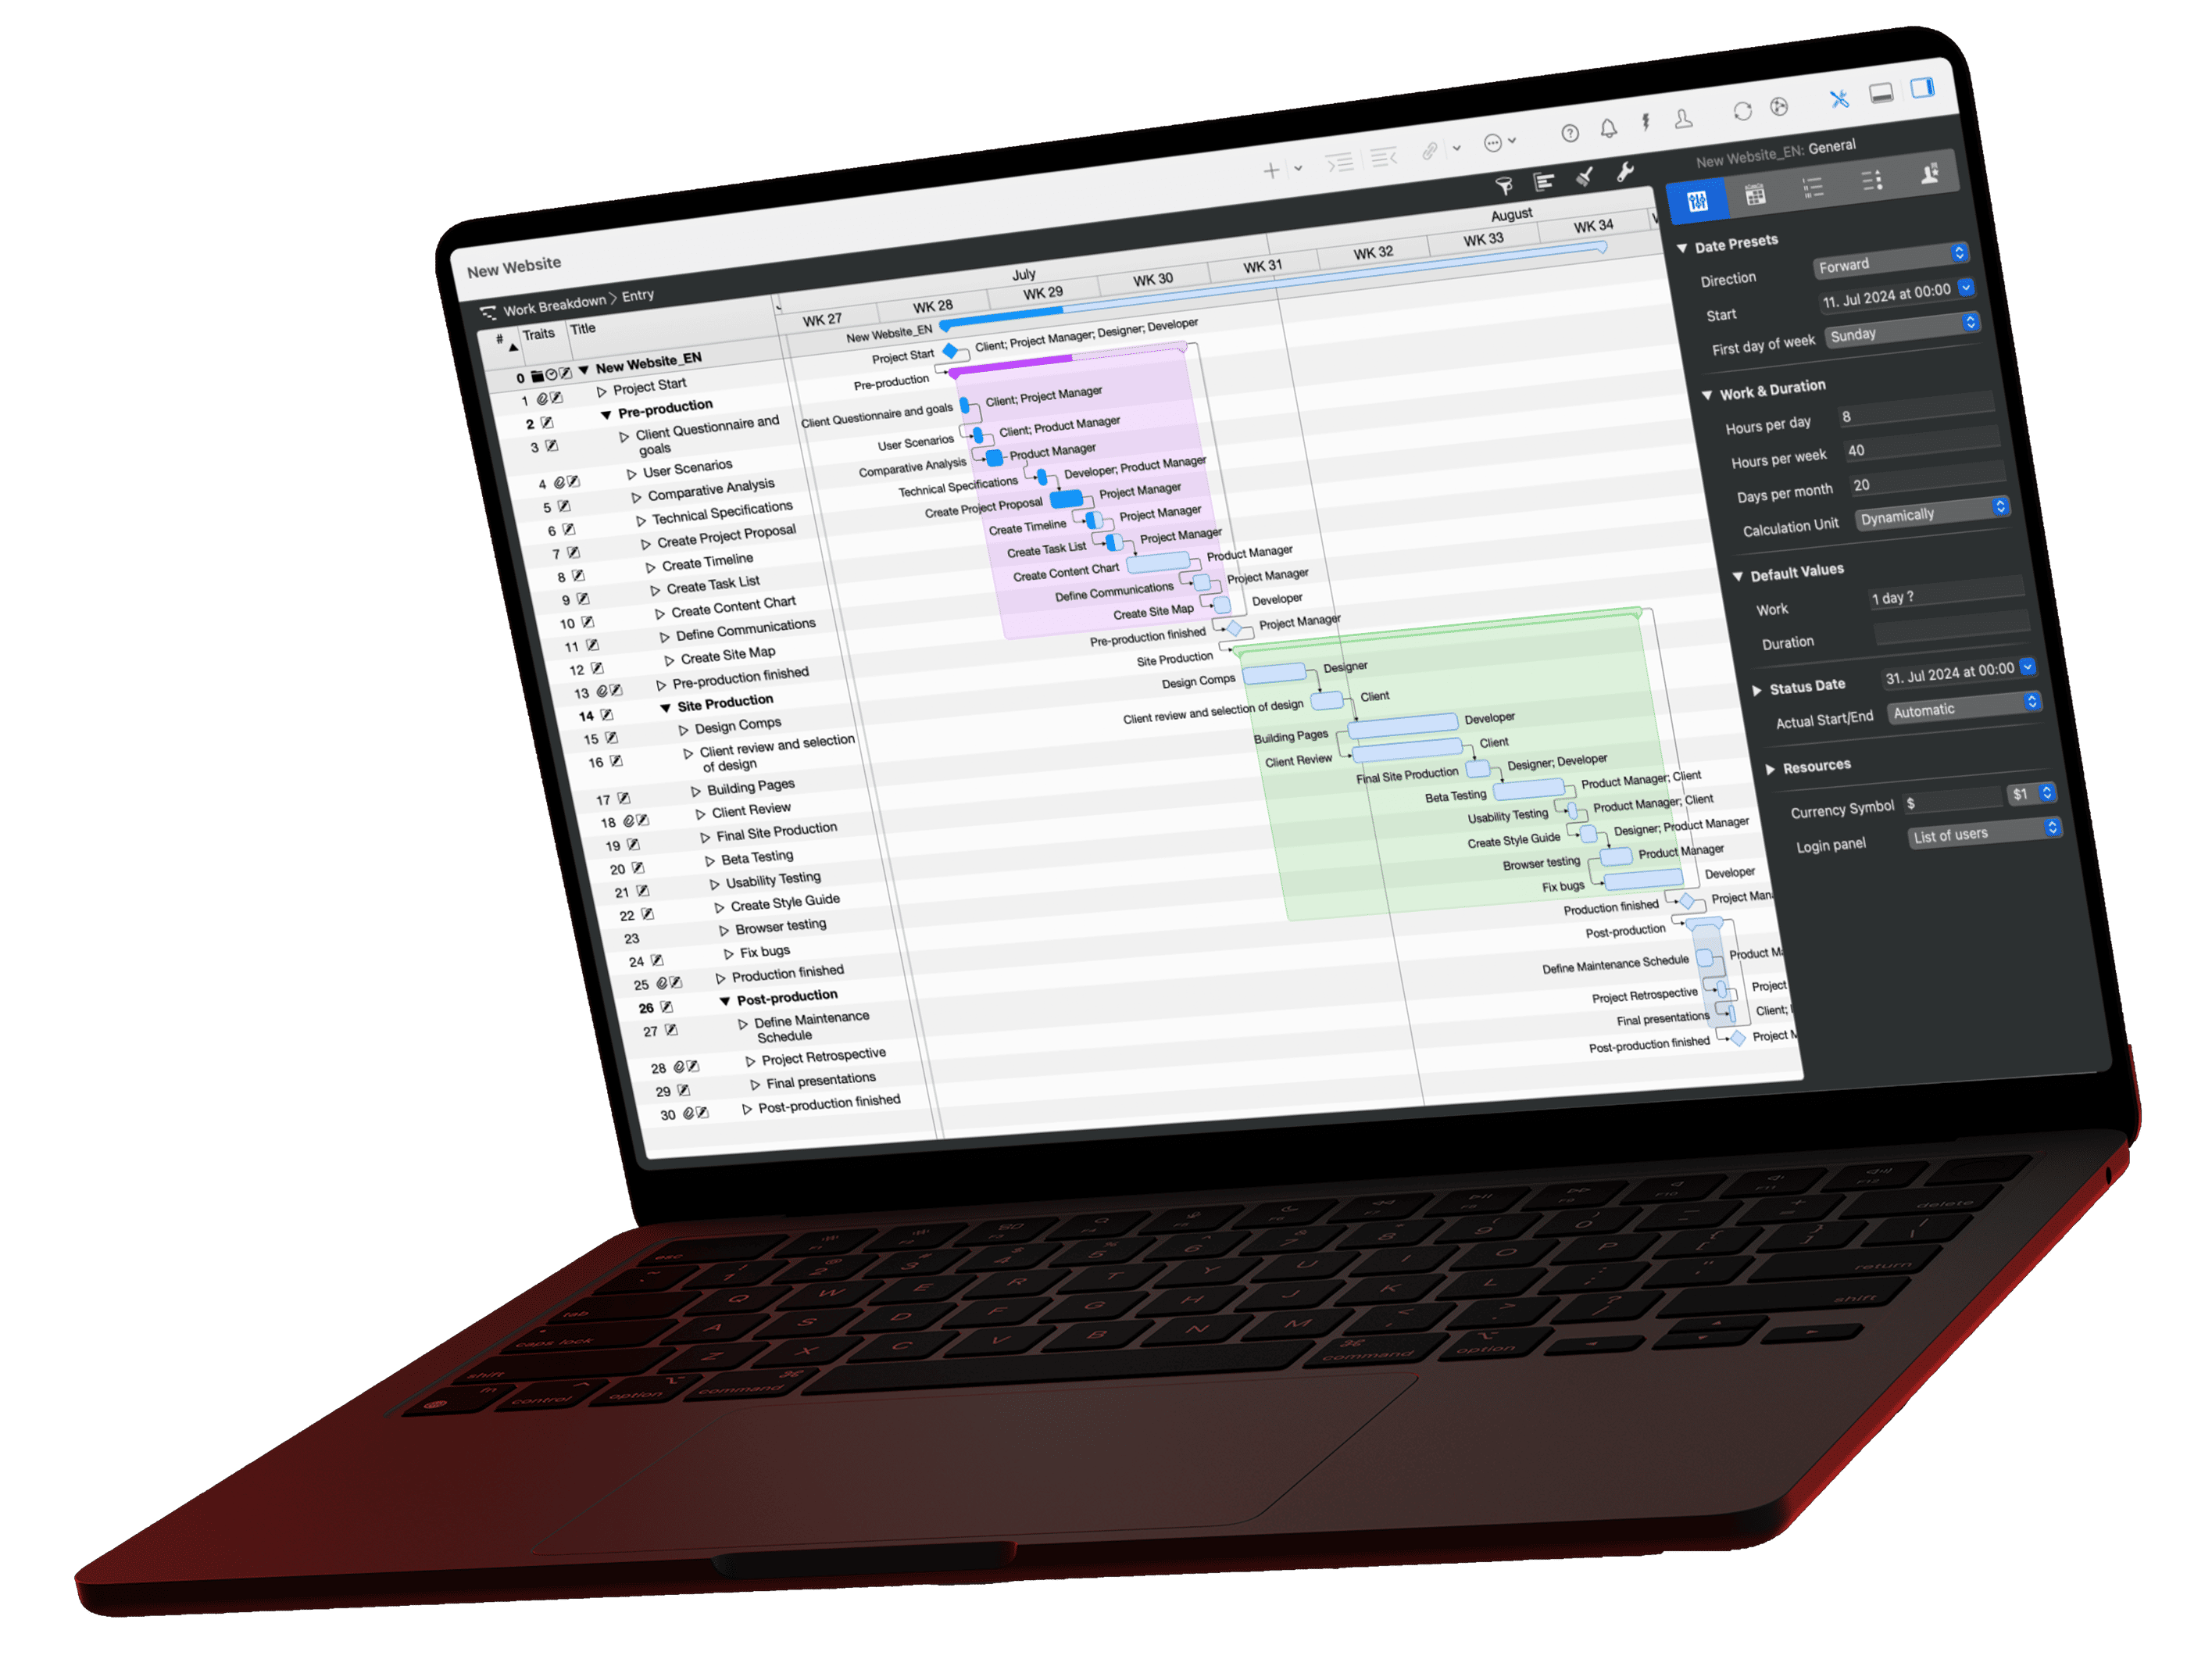
First, let's introduce you to the Merlin main window. It is divided into four zones. At the top, you'll find the Toolbar (1), your gateway to frequently used features. Just below, the Function Bar (2) stands ready, giving you control over how you view your projects. The left side of the Function Bar indicates the view type and project view that will be displayed in the workspace below. If you're ever uncertain about a feature or button, simply hover over it. Friendly yellow hints will pop up, offering explanatory text to provide clarity. In case dynamic help is deactivated, click on the question mark symbol on the right side of the Toolbar. This intuitive assistance extends across all fields, columns, and menu commands. For iPad users, holding your finger over an object will provide similar helpful guidance.
The workspace (3) is the heart and soul of Merlin Project. Each view type offers multiple project views that display various project information in the workspace. Depending on the view type selected via the Function Bar, you can view your project's work breakdown, net plans, resources, assignments, reports, and attachments.
In the Inspector (4), you can edit details based on the elements you select. Currently, it displays the general information on a project as no activities, groups or anything else have been added to the project file yet. Once you have added further elements, you are able to view, add or change details through the inspector. The inspector title signifies which element you are currently focusing on. In the screenshot, you inspect "New Project: General". The inspector is by default set to "always dark". If you wish, you can change the appearance in the settings (press ⌘+, or go to "Merlin Project > Settings...") under "General > Inspector appearance > Adjust automatically".
View Types in Merlin Project

The Work Breakdown view type is central to Merlin Project, presenting project elements such as activities, milestones, groups, and resources in a hierarchical design. This format simplifies project structure modifications and resource assignment management. You can use this view to visualize timelines, durations, and dependencies. You can access this view with the shortcut ⌘+1 as well.
The Net Plan view type provides graphical visualizations compared to the WBS:
- The Flow project view emphasizes activity sequences
- Kanban groups activities based on status, making it ideal for tracking progress in agile project management settings
- Mind Map and Organizational Chart allow you to map and cluster activities based on commonalities, particularly useful for creative project management methods. You can access this view with the shortcut ⌘+2 as well.
The Resources view type provides detailed information about your project's resources, including personnel, materials, companies, and equipment, along with their associated project costs. This view lays the foundation for project controlling, which we will delve into in upcoming chapters. You can access this view with the shortcut ⌘+3 as well.
The Assignments view helps with resource coordination and analysis, offering insights into cost expectations, comparisons between planned and actual values for cost and time requirements, and resource schedules and workloads. It ensures that all project members are well-utilized and not under- or over-allocated. You can access this view with the shortcut ⌘+4 as well.
The Reports view allows you to view, export, and share project information. You can use pre-set reports or create your own, which we will explore further in the chapter on Project Controlling. You can access this view with the shortcut ⌘+5 as well.
The Attachments view enables the addition and viewing of attachments, additional information, related to specific activities or milestones. These include checklists, events, files, information, issues, and risks. This minimizes information asymmetries by storing all project-related data within your document, ensuring critical information is available to all users. You can access this view with the shortcut ⌘+6 as well.
Now, let's dive into the most important view types in detail, looking at how they align with three project management methodologies: traditional, agile, and creative project management, and identifying which view type best suits their needs.
Questions about the learning path?
We’re happy to refer you to our partners. They offer dedicated Merlin trainings for any topic and support rolling out Merlin across your projects.
We recommend: Gareth Watson, certified Merlin Project Trainer (online & inhouse).