The Elements concept provides you with a single collection point for the many types of information obtained during the life of a project. Imagine an attachment to an email. The same principal is used for the elements concept in Merlin. Which is why the toolbar paper clip icon represents the Elements feature.
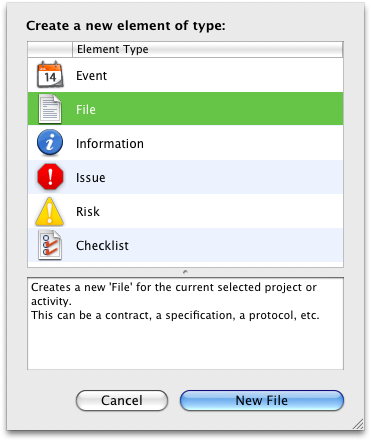
Merlin provides several types of elements to choose from, each serving a different purpose:
You will find the Elements section below each of the views offered in Merlin. You can expand or contract this section using the separators or by clicking on the paperclip toolbar button or pressing the F2 key.
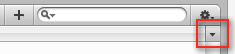
In the upper right corner of the Element table, you will find an arrow that you can use to modify the amount of Elements displayed per activity (or project).
 When the arrow points down (this means it is expanded), all Elements within the selected activity will be displayed. Furthermore, all those Elements that are listed in the outline for the sub-activities will also be displayed.
 When the arrow points to the right (minimized), only those Elements that are contained within the selected activity will be shown.
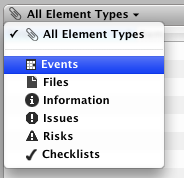
The Elements bar on the top left corner of the Elements view is clickable. It allows you to filter the listed Elements by type. When a specific type is selected, pressing the "+" button will add that specific type of Element making it more convenient to add a type of elements quickly.
- Select the relevant activity, group or project to which you would like to attach an Element to.
- Select "Insert - Element" or the keyboard shortcut corresponding to the type of element you wish to create. Alternatively, you can also click on the plus symbol in the Element section below the outline.
You can delete an element by selecting it then pressing "delete" button
