With the help of the styles it is possible to format your project look according to rules. You can change the look of:
- Activities
- Gantt chart
- Netplan
- Resources
- Utilization
- Elements
The styles comprise the following areas:
- Displayed contents
- Row height
- Fonts
- Foreground and background color
- Border style
- Shadow
After selecting the view options in the "View" menu, you can access the "Styles" tab in the upper right corner of the window.

In the section "Selected Part" we have developed a "click-able preview," in which you can select the part to be formatted by clicking it. You will find several categories in the "Condition" section, which can be applied to an activity while formatting. Furthermore, you will find a list for groups, status flags and other project planning topics. In the section below all other available settings will be listed according to the selected part.

Styles hierarchy
The condition "General" is the basic format from which all other conditions are derived. This means that when, for example, you change the color of the General formatting, all other styles that have not been explicitly modified in color will inherit their display from the General condition. The hierarchy is displayed in the popup menu.
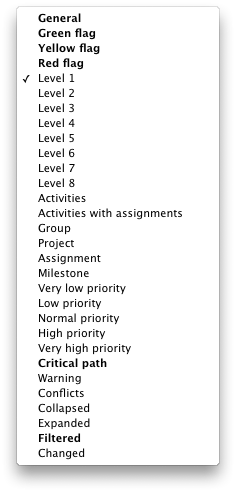
Bold items in the popup menu have explicit values set.

